Highlights of Stereolithography
•The first Rapid Prototyping technique and still the most widely used.
•Inexpensive compared to other techniques.
•Uses a light-sensitive liquid polymer.
•Requires post-curing since laser is not of high enough power to completely cure.
•Long-term curing can lead to warping.
•Parts are quite brittle and have a tacky surface.
•No milling step so accuracy in z can suffer.
•Support structures are typically required.
•Process is simple: There are no milling or masking steps required.
•Uncured material can be toxic. Ventilation is a must.
Introduction to Stereolithography
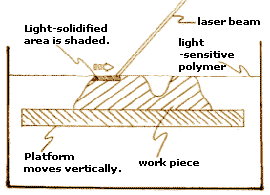
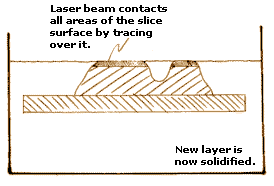
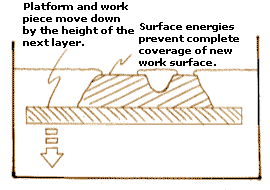
Stereolithography (SLA), the first Rapid Prototyping process, was developed by 3D Systems of Valencia, California, USA, founded in 1986. A vat of photosensitive resin contains a vertically-moving platform. The part under construction is supported by the platform that moves downward by a layer thickness (typically about 0.1 mm / 0.004 inches) for each layer. A laser beam traces out the shape of each layer and hardens the photosensitive resin.
The Stereolithography (SLA) System overall arrangement:
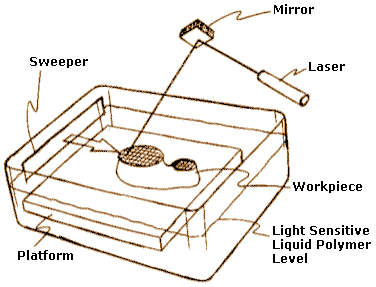
Stereolithography Process
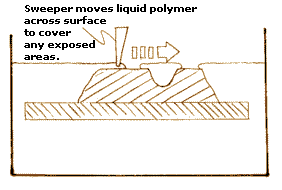
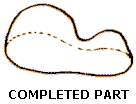
The sequence of steps for producing an Stereolithography (SLA) layer is shown in the following figures:
 |
 |
 |
 |
 |
Uncured resin is removed and the model is post-cured to fully cure the resin. Because of the layered process, the model has a surface composed of stair steps. Sanding can remove the stair steps for a cosmetic finish. Model build orientation is important for stair stepping and build time. In general, orienting the long axis of the model vertically takes longer but has minimal stair steps. Orienting the long axis horizontally shortens build time but magnifies the stair steps. For aesthetic purposes, the model can be primed and painted.
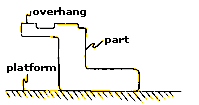
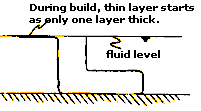
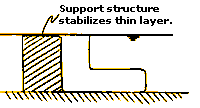
During fabrication, if extremities of the part become too weak, it may be necessary to use supports to prop up the model. The supports can be generated by the program that creates the slices, and the supports are only used for fabrication. The following three figures show why supports are necessary:
 |
 |
 |

